Free mail dowloadnow
Thứ Tư, 11 tháng 3, 2015
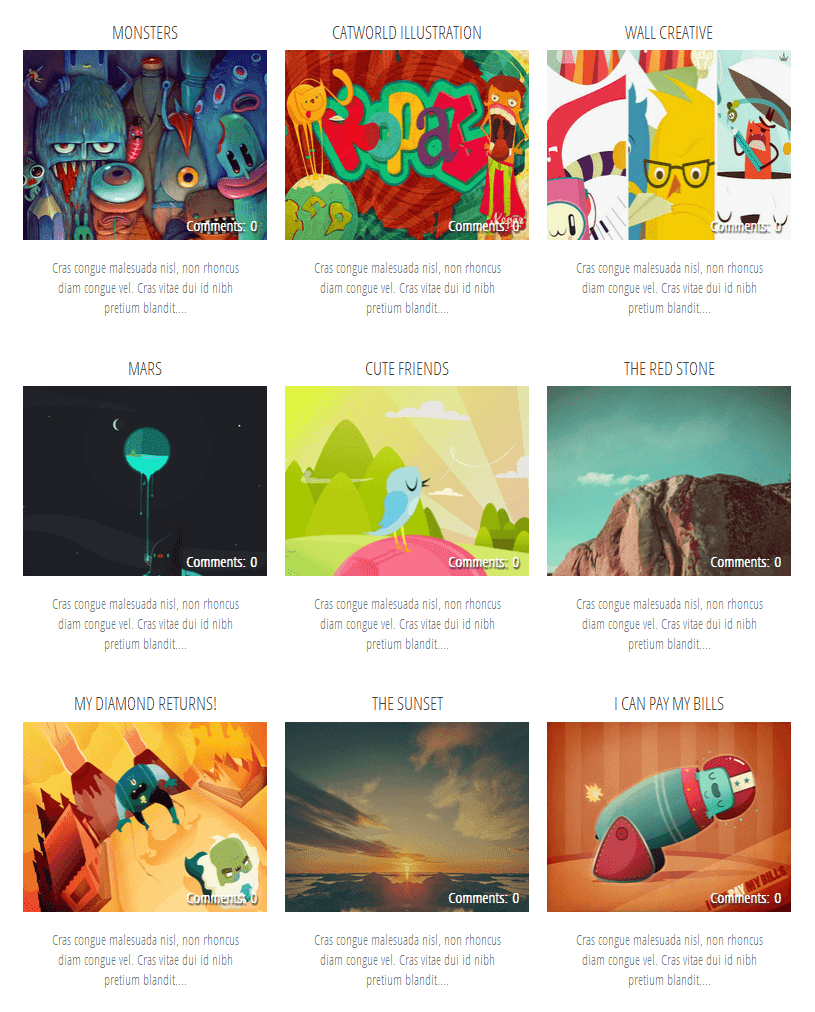
Building a List/Grid View Switcher in Blogger with Auto Read More
A list of posts in grid or list view provides a more defined canvas with which a blogger or website owner can use as a guide in creating content. This concept has extended to visitors, where they can have control on whether or not they wish to view posts in list or grid view. While custom modification codes are shared by some blogging sites, others are not. Some that are shared, however, can be complex even to bloggers themselves, such as JQuery.
The good news is there are lightweight codes available, including the Auto Read More in Blogger. Through it, a blogger can add two buttons that will enable visitors to switch between grid view and list view, depending on what they prefer. These buttons, however, are only visible on limited pages - homepage, label page and archive page. Nonetheless, it is better than not having this particular feature at all.
Unlike JQuery, the Auto Read More uses HTML, CSS and JavaScript. To view posts in a list view, two sets of CSS codes are added as one. Another set is added to view posts in grid view. Other combination of codes is used to enable easy switch between views, particularly at a click of a button.

Step 2. Click anywhere inside the code area and press the CTRL + F keys to open the search box. Type this tag below inside the box and hit Enter to find it:
Step 4. Next, search for the following line:
Step 8. Finally, click "Preview" to see if everything looks good and press the 'Save Template' button to save the changes...
Considering the ease with which the codes can be customized, building a list/grid view switcher would be completed in no time. A real bonus is that Auto Read More works on all platforms, with cross-browser support as well.
The good news is there are lightweight codes available, including the Auto Read More in Blogger. Through it, a blogger can add two buttons that will enable visitors to switch between grid view and list view, depending on what they prefer. These buttons, however, are only visible on limited pages - homepage, label page and archive page. Nonetheless, it is better than not having this particular feature at all.
Unlike JQuery, the Auto Read More uses HTML, CSS and JavaScript. To view posts in a list view, two sets of CSS codes are added as one. Another set is added to view posts in grid view. Other combination of codes is used to enable easy switch between views, particularly at a click of a button.
How to Add a List/Grid View Switcher in Blogger
Step 1. Log into your Blogger dashboard and select your blog, then go to "Template" > press the "Edit HTML" button.Step 2. Click anywhere inside the code area and press the CTRL + F keys to open the search box. Type this tag below inside the box and hit Enter to find it:
</head>Step 3. Just above the </head> tag, copy and paste the following CSS style and scripts:
<script type='text/javascript'>
function list_view(){
if(document.getElementsByClassName("post")) {elementArray = document.getElementsByClassName("post"); while (elementArray.length) {elementArray[0].className = "post-grid-view";}}
if(document.getElementsByClassName("post-title")) {elementArray = document.getElementsByClassName("post-title"); while (elementArray.length) {elementArray[0].className = "post-title-grid";}}
}
function grid_view(){
if(document.getElementsByClassName("post-grid-view")) {elementArray = document.getElementsByClassName("post-grid-view"); while (elementArray.length) {elementArray[0].className = "post";}}
if(document.getElementsByClassName("post-title-grid")) {elementArray = document.getElementsByClassName("post-title-grid"); while (elementArray.length) {elementArray[0].className = "post-title";}}
}
</script>
<script type='text/javascript'>
posts_no_thumb_sum = 100;
posts_thumb_sum = 350;
</script>
<script type='text/javascript'>
//<![CDATA[
function removeHtmlTag(strx,chop){
if(strx.indexOf("<")!=-1)
{
var s = strx.split("<");
for(var i=0;i<s.length;i++){
if(s[i].indexOf(">")!=-1){
s[i] = s[i].substring(s[i].indexOf(">")+1,s[i].length);
}
}
strx = s.join("");
}
chop = (chop < strx.length-1) ? chop : strx.length-2;
while(strx.charAt(chop-1)!=' ' && strx.indexOf(' ',chop)!=-1) chop++;
strx = strx.substring(0,chop-1);
return strx+'...';
}
function createSummaryAndThumb(pID, pURL, pTITLE){
var div = document.getElementById(pID);
var imgtag = "";
var img = div.getElementsByTagName("img");
var summ = posts_no_thumb_sum;
if(img.length>=1) {
imgtag = '<span class="posts-thumb" style="float:left; margin-right: 10px;"><a href="'+ pURL +'"><img src="'+img[0].src+'" /></a></span>';
summ = posts_thumb_sum;
}
else {
imgtag = '<span class="posts-thumb" style="float:left; margin-right: 10px;"><a href="'+ pURL +'" title="'+ pTITLE+'"><img src="https://blogger.googleusercontent.com/img/b/R29vZ2xl/AVvXsEhiH3eDTFO7B3RlP7kLZiYCykZqmpgoupVQTyJQRV5Y3Hfp5jfPIgpp8haBkbg0umj5dgiqydeUG2rKV1EKsUJb3QWcEtT52V9uDaB01w_VF3GJ71JvWYMgCIM6EBBZGdFq79LqhnhRF3Lq/s1600/sorry-image-not-available.png" style="margin-top: -30px;" /></a></span>';
summ = posts_thumb_sum;
}
var summary = imgtag + '<a href="'+ pURL +'"><div class="post-summary-text">' + removeHtmlTag(div.innerHTML,summ) + '</div></a>';
div.innerHTML = summary;
}
//]]>
</script>
<b:if cond='data:blog.pageType != "static_page"'>
<b:if cond='data:blog.pageType!= "item"'>
<style>
#list-view-button {font-family: Verdana; text-align:left;cursor:pointer;font-size: 14px;border-bottom: 5px solid #eaeaea;text-decoration: none;}
#list-view-button a{text-decoration: none; color: #666;}
.grid-view-button {background-color:#efefef;color:#666;padding:5px 10px;border-radius: 5px;font-size: 12px;}
.list-view-button {background-color:#efefef;color:#000;padding:5px 10px;border-radius: 5px;font-size: 12px;}
.post-grid-view {width:100%;height:250px;overflow: hidden;float:left;margin:0px 0px 20px !important;position:relative;display: block; -webkit-transition:all 0.5s ease 0s; -moz-transition:all 0.5s ease 0s; -o-transition:all 0.5s ease 0s; transition:all 0.5s ease 0s; }
.post-grid-view .posts-thumb {width:40% !important;height:250px !important;float:left;margin:0px;position:relative;border-top: 0px solid transparent !important;overflow: hidden;}
.post-grid-view .post-header {display: none;}
.post-grid-view .post-body img {min-width: 300px !important; min-height: 250px !important;display:block;width:100%!important;height:auto!important;max-width:800px!important;max-height:400px!important;border:none;outline:none;position:relative;margin: 0px;padding:0;}
.post-grid-view .post-summary-text {opacity: 1; background: none; width: 58%;font-size: 120% !important;clear: none !important; display: inline-block !important; padding: 80px 0px !important; color: #666 !important; text-shadow: none !important; float: right !important; text-align: left; position: relative !important; font-family: 'Open Sans Condensed', sans-serif;}
.post-grid-view .post-body {height: 250px;background:#f5f5f5; box-shadow: none !important;}
.post-title-grid a { font-size:170%;color: #777;font-family: 'Open Sans Condensed', sans-serif;}
.post-title-grid { position: absolute; left: 42%; top: 5%; z-index: 1;}
.post-grid-view .post-footer {left: 41%; display:block;position: absolute; bottom: 2%;font-size: 120%; background: transparent !important; border: 0px solid transparent !important;font-family: 'Open Sans Condensed', sans-serif;}
.post-grid-view .post-footer a{color: #128EC9;}
.post-grid-view a.comment-bubble {display: none;}
.main-inner .column-center-inner .section {margin: 0px !important;}
.post { -webkit-transition:all 0.5s ease 0s; -moz-transition:all 0.5s ease 0s; -o-transition:all 0.5s ease 0s; transition:all 0.5s ease 0s;}
#blog-pager {clear:both;}
.post {height:auto;width:32.2%;display:inline-block;text-decoration:none;float:left;margin:0 1% 1% 0%;overflow: hidden;padding:0!important;}
.date-header {display: none;}
h3.post-title a {font-size:90%;font-family: 'Open Sans Condensed', sans-serif;text-transform:uppercase;color:#fff;text-shadow: 1px 1px 0 rgba(0, 0, 0, 0.1);font-weight: bold;}
h3.post-title {text-align: center; position:absolute;top:0;width:100%;overflow:hidden;margin:0px !important;padding-top: 30%; background-color: rgba(50, 126, 213, 0.8);transform: scale(1);opacity: 0;z-index: 10;height: 100%;transition: all 300ms ease-out 0s;}
h3.post-title:hover {opacity: 1;}
.posts-thumb {width:100%!important;height:200px!important;overflow:hidden;clear:both;}
.post-body {border-radius:2px;box-shadow:0 5px 4px 1px rgba(0,0,0,0.1);position:relative;overflow: hidden;}
.post-body a {text-decoration: none;}
.post-body img {display:block;width:100%!important;height:auto!important;max-width:800px!important;max-height:400px!important;min-width:200px!important;min-height:200px!important;border:none;outline:none;position:relative;margin: 0px;padding:0;}
.post-summary-text {display: none;}
a.comment-bubble {color:#fff;text-decoration:none;font-size:100%;width: 100%;text-align: center;position:absolute;top:175px;left: 0px;text-shadow:1px 2px 1px #333;font-family: 'Pacifico', cursive;z-index: 122;}
a.comment-bubble:before { content: "Comments: " url(https://blogger.googleusercontent.com/img/b/R29vZ2xl/AVvXsEiZGWqoF9N8DmIHQCCsUwoDmp1cwPXwCFE8VOsSEtwkUE_88nIDd6cEm7aX0iEYOwQL9mwkQqPb7-WFEIg0MlJcsHLVVx4q6FU9iA-wH-oUHHMzBWU5sHxfV-vVC4Lxh9g9eW5mn6JI9wKR/s1600/heart-active.png);}
.post-header,.post-footer {display:none;}
</style></b:if></b:if>
<link href='http://fonts.googleapis.com/css?family=Open+Sans+Condensed:300' rel='stylesheet' type='text/css'/>
<link href='http://fonts.googleapis.com/css?family=Pacifico' rel='stylesheet' type='text/css'/>
Step 4. Next, search for the following line:
<b:section class='main' id='main' showaddelement='no'>...in case you can't find it, search for this one instead:
<b:section class='main' id='main' showaddelement='yes'>Step 5. Just above this line, add the following code:
<b:if cond='data:blog.pageType != "static_page"'>Step 6. Now, search the code below:
<b:if cond='data:blog.pageType!= "item"'>
<div id='list-view-button'><a class='grid-view-button' onclick='grid_view()'><img src='https://blogger.googleusercontent.com/img/b/R29vZ2xl/AVvXsEiFxdvSkL9iSWS9I5vy7FGHgh8gTXy9oTo5VC2cC88iNYyCjzlveGqwSlHNv23ilrqlQzgRXtD2DJp259g2Fgb5rwFX48c2dsIVOIB9jEEvovR9WKsEMXq1PrnDeXPnz9QYWm95S1wfqwPK/s1600/search-grid-icon.png' style='margin: -8px 1px -3px -6px;width: 16px;'/> Grid View</a> <a class='list-view-button' onclick='list_view()'><img src='https://blogger.googleusercontent.com/img/b/R29vZ2xl/AVvXsEgsfdJ9IYzAdPcK7irnf8wKZpKpDbr0K-Y-yGbfTXc-Dx15IE21v02kc33dPqpdbDahCTofj2yfJmjidOdmj5BzYduEsowPiHuNkiSOmokZRTst0dogz6wdAYLJfEIoWTVHjcPvDssHvzf4/s1600/icon-list-view.png' style='margin: -8px 1px -3px -6px;width: 16px;'/> List View</a></div>
</b:if></b:if>
<data:post.body/>Step 7. You will find 3 occurrences of this code, replace only the second and third one with this one below:
<b:if cond='data:blog.pageType != "static_page"'>Important: if you already added the auto read more script, remove the previous one in order to make this work.
<b:if cond='data:blog.pageType != "item"'>
<div expr:id='"summary" + data:post.id'>
<data:post.body/>
</div>
<script type='text/javascript'>createSummaryAndThumb("summary<data:post.id/>","<data:post.url/>");</script>
<b:if cond='data:post.allowComments'>
<a class='comment-bubble' expr:href='data:post.addCommentUrl' expr:onclick='data:post.addCommentOnclick'>
<data:post.numComments/>
</a>
</b:if>
</b:if>
</b:if>
<b:if cond='data:blog.pageType == "item"'>
<data:post.body/>
</b:if>
<b:if cond='data:blog.pageType == "static_page"'>
<data:post.body/>
</b:if>
Step 8. Finally, click "Preview" to see if everything looks good and press the 'Save Template' button to save the changes...
That's it!
Adding a dynamic view switcher on a blog will make viewing content a lot easier for visitors. Whether using a list or grid view, a more compressed list of posts will eliminate the need to click on the next page, which could take time if loading takes a while to complete. For a blog archive, using the Auto Read More codes in Blogger will surely make everyone's viewing experience very convenient.Considering the ease with which the codes can be customized, building a list/grid view switcher would be completed in no time. A real bonus is that Auto Read More works on all platforms, with cross-browser support as well.
Thứ Năm, 5 tháng 3, 2015
Add Masonry, Grid Layouts to Blogger Posts with CSS and Javascript
How a website's content is displayed can spell the difference between being popular and obscure. Anything that looks chaotic or hardly readable is never going to be anyone's favorite. This is why content must be displayed in an organized, easy to follow and straightforward manner. Nothing works better than a structured grid, in this case.
Posts listed in grid view provide an excellent viewing experience for both the blogger or website owner and the visitors. This is especially true if the grid comes with images that would play with a person's visual inclination. What is great about grids is the seamless and smooth layout, complemented with a structured yet simple architecture. This makes it easier to navigate through a blog archive or product page. The style also enables a website owner to present posts in a more artistic and informative manner, without delving into the details. Suffice to say that a grid view demands creativity to be effortlessly mixed with functionality.
How views can be switched depends on a number of changes in a blog's codes. Some are fairly easy to implement, while others can be a little complex. Not to worry, as there are guides that will be provided. Grid styles also come in huge varieties, with each one designed to cater to a specific audience. Now, are you ready to go on the grid?
Although changes to the CSS codes have to be made to implement the grid style view and make it compatible with a blog's template, all the work will be worth it once it is up and running.
Important:
Before anything make sure that you backup your Blogger template! If have encounter any problems with your edits, you can revert the template back to its previous condition by restoring it from your backup. For this, go to 'Template' in the left menu > click on the 'Backup/Restore' button in the upper right corner and press the 'Download Full Template' button - choose where you want to save the file on your computer and click the 'Save' button.
Now we can safely proceed with editing our Blogger template. If you run into problems, just revert back to your saved template.
Step 2. Go to "Template" located on the left side of the screen and press the "Edit HTML" button.
Step 3. Click anywhere inside the code area and press the CTRL+F keys to open the search box, then type the following tag inside the box (hit Enter to find it):
Step 7. Now choose one of the styles below, copy the code provided and paste it just above the </head> tag:


Please note that the masonry layout might not work if you have a customized template, also older posts will appear vertically (from top to bottom) instead of left to right.
Step 8. Click "Preview" and if everything looks fine, press the "Save Template" button.
Posts listed in grid view provide an excellent viewing experience for both the blogger or website owner and the visitors. This is especially true if the grid comes with images that would play with a person's visual inclination. What is great about grids is the seamless and smooth layout, complemented with a structured yet simple architecture. This makes it easier to navigate through a blog archive or product page. The style also enables a website owner to present posts in a more artistic and informative manner, without delving into the details. Suffice to say that a grid view demands creativity to be effortlessly mixed with functionality.
How views can be switched depends on a number of changes in a blog's codes. Some are fairly easy to implement, while others can be a little complex. Not to worry, as there are guides that will be provided. Grid styles also come in huge varieties, with each one designed to cater to a specific audience. Now, are you ready to go on the grid?
Features
What features can you expect from a grid style post in Blogger?
- All the posts will follow the grid style when switching to grid view.
- While the codes are being customized, the posts are left untouched. Their length, however, could be changed accordingly.
- Auto Read More will be applied on all posts.
- Thumbnails are automatically added based on the first picture found in each post.
- Code is secure and is used across the board. In fact, 99% of bloggers are using a similar code to enable grid style posts in blogger.
What are the benefits of grid style?
- Quick loading time of posts. Since only the snippets are loaded in certain pages, or a thumbnail and a caption, pulling up a blog archive would be quicker. When loading time is decreased, user experience is greatly enhanced.
- Professional-looking blog. Without the chaos and concerns on readability, a website can look really clean and professional. Combined with the right colors and images, it can also leave a visual impact.
- Improved website ranking. Because visitors have to click in order to view the rest of the post, page views of a site will significantly increase. This makes for a better SEO strategy.
Although changes to the CSS codes have to be made to implement the grid style view and make it compatible with a blog's template, all the work will be worth it once it is up and running.
Important:
Before anything make sure that you backup your Blogger template! If have encounter any problems with your edits, you can revert the template back to its previous condition by restoring it from your backup. For this, go to 'Template' in the left menu > click on the 'Backup/Restore' button in the upper right corner and press the 'Download Full Template' button - choose where you want to save the file on your computer and click the 'Save' button.
Now we can safely proceed with editing our Blogger template. If you run into problems, just revert back to your saved template.
How to Create Masonry, Grid Style Posts in Blogger
Step 1. Log into your Blogger dashboard and click on the blog where you want to apply the grid style.Step 2. Go to "Template" located on the left side of the screen and press the "Edit HTML" button.
Step 3. Click anywhere inside the code area and press the CTRL+F keys to open the search box, then type the following tag inside the box (hit Enter to find it):
</head>Step 4. Now copy the script below and paste it just before the </head> tag:
<script type='text/javascript'>Step 5. Find the following code snippet using CTRL+F or Command + F:
posts_no_thumb_sum = 100;
posts_thumb_sum = 100;
</script>
<script type='text/javascript'>
//<![CDATA[
function removeHtmlTag(strx,chop){
if(strx.indexOf("<")!=-1)
{
var s = strx.split("<");
for(var i=0;i<s.length;i++){
if(s[i].indexOf(">")!=-1){
s[i] = s[i].substring(s[i].indexOf(">")+1,s[i].length);
}
}
strx = s.join("");
}
chop = (chop < strx.length-1) ? chop : strx.length-2;
while(strx.charAt(chop-1)!=' ' && strx.indexOf(' ',chop)!=-1) chop++;
strx = strx.substring(0,chop-1);
return strx+'...';
}
function createSummaryAndThumb(pID, pURL, pTITLE){
var div = document.getElementById(pID);
var imgtag = "";
var img = div.getElementsByTagName("img");
var summ = posts_no_thumb_sum;
if(img.length>=1) {
imgtag = '<span class="posts-thumb" style="float:left; margin-right: 10px;"><a href="'+ pURL +'"><img src="'+img[0].src+'" /></a></span>';
summ = posts_thumb_sum;
}
else {
imgtag = '<span class="posts-thumb" style="float:left; margin-right: 10px;"><a href="'+ pURL +'" title="'+ pTITLE+'"><img src="https://blogger.googleusercontent.com/img/b/R29vZ2xl/AVvXsEhiH3eDTFO7B3RlP7kLZiYCykZqmpgoupVQTyJQRV5Y3Hfp5jfPIgpp8haBkbg0umj5dgiqydeUG2rKV1EKsUJb3QWcEtT52V9uDaB01w_VF3GJ71JvWYMgCIM6EBBZGdFq79LqhnhRF3Lq/s1600/sorry-image-not-available.png" style="margin-top: -30px;" /></a></span>';
summ = posts_thumb_sum;
}
var summary = imgtag + '<a href="'+ pURL +'"><div class="post-summary-text">' + removeHtmlTag(div.innerHTML,summ) + '</div></a>';
div.innerHTML = summary;
}
//]]>
</script>
<data:post.body/>Step 6. After pressing the "Enter" key on your keyboard, you may find three occurrences of the above code, replace only the second and the third one with this code below:
<b:if cond='data:blog.pageType != "static_page"'>
<b:if cond='data:blog.pageType != "item"'>
<div expr:id='"summary" + data:post.id'>
<data:post.body/>
</div>
<script type='text/javascript'>createSummaryAndThumb("summary<data:post.id/>","<data:post.url/>");</script>
<b:if cond='data:post.allowComments'>
<a class='comment-bubble' expr:href='data:post.addCommentUrl' expr:onclick='data:post.addCommentOnclick'>
<data:post.numComments/>
</a>
</b:if>
</b:if>
</b:if>
<b:if cond='data:blog.pageType == "item"'>
<data:post.body/>
</b:if>
<b:if cond='data:blog.pageType == "static_page"'>
<data:post.body/>
</b:if>
Step 7. Now choose one of the styles below, copy the code provided and paste it just above the </head> tag:
Simple Grid Design
<b:if cond='data:blog.pageType != "static_page"'>
<b:if cond='data:blog.pageType!= "item"'>
<style>
#blog-pager {
clear:both;
}
.post {
height: auto;
width:30.8%;
overflow: hidden;
display:inline-block;
text-decoration:none;
float:left;
margin:0 1.1% 2%;
padding: 0px !important;
}
h3.post-title a {
font-size:75%;
font-family: 'Open Sans Condensed', sans-serif;
text-transform:uppercase;
padding:0;
color:#444;
}
h3.post-title {
height: 26px;
text-align:center;
width:100%;
margin:0!important;
padding-bottom: 4%;
}
.date-header {
display: none;
}
.post-body a {
text-decoration: none;
}
.posts-thumb {
width:100%!important;
height:190px!important;
overflow:hidden;
clear:both;
}
.post-body img {
display:block;
width:100%!important;
height:auto!important;
max-width:800px!important;
max-height:400px!important;
min-width:190px!important;
min-height:190px!important;
border:none;
outline:none;
position:relative;
margin: 0px;
padding:0;
}
.post-summary-text {
color:#777;
font-size:100%!important;
font-family: 'Open Sans Condensed', sans-serif;
text-align:center;
clear:both;
overflow:hidden;
margin:5px 0 0;
padding:7% 10%;
}
a.comment-bubble {
color:#fff;
text-decoration:none;
font-size:100%;
font-weight: bold;
right:10px;
position:absolute;
top:165px;
text-shadow:1px 2px 1px #333;
font-family: 'Open Sans Condensed', sans-serif;
}
a.comment-bubble:before {
content: "Comments: ";
}
.post-header,.post-footer {
display:none;
}
</style></b:if></b:if>
<link href='http://fonts.googleapis.com/css?family=Open+Sans+Condensed:300' rel='stylesheet' type='text/css'/>
Grid Layout with Post Summary and Thumbnail
<b:if cond='data:blog.pageType != "static_page"'>
<b:if cond='data:blog.pageType!= "item"'>
<style>
#blog-pager {
clear:both;
}
.post {
height:auto;
width:31%;
display:inline-block;
text-decoration:none;
float:left;
margin:0 1.1% 2%;
padding:0!important;
}
h3.post-title a {
font-size:75%;
font-family: 'Open Sans Condensed', sans-serif;
text-transform:uppercase;
color:#111;
padding:0;
}
h3.post-title {
text-align:center;
height:22px;
position:absolute;
bottom:23%;
width:100%;
z-index:101;
overflow:hidden;
margin:0!important;
padding:10px 0;
}
.date-header {
visibility:hidden;
height:0!important;
width:0!important;
margin:0!important;
padding:0!important;
}
.posts-thumb {
width:100%!important;
height:190px!important;
overflow:hidden;
clear:both;
border-bottom:3px solid #00C8BD;
border-top:3px solid #558ABB;
}
.posts-thumb:hover {
border-top:3px solid #FF664E;
border-bottom:3px solid #FEBE36;
}
.post-body {
border-radius:2px;
box-shadow:0 0 6px 1px rgba(0,0,0,0.1);
position:relative;
height:auto;
}
.post-body a {
text-decoration: none;
}
.post-body img {
display:block;
width:100%!important;
height:auto!important;
max-width:800px!important;
max-height:400px!important;
min-width:190px!important;
min-height:190px!important;
border:none;
outline:none;
position:relative;
margin: 0px;
padding:0;
}
.post-summary-text {
color:#555;
background:#f5f5f5 url(https://blogger.googleusercontent.com/img/b/R29vZ2xl/AVvXsEivLNyPTEliCseCyBovZLT5OGuwIzd94hUbDdlFynscj_vg5FBrfm3RMp93d-S7foZiHfBEhvsZOMdcMnywuiksfOdE5JQIacdu8q9wohPCuvBfYQIO5aKSYCV51HkO6f6TnM-joVxc_2_C/s1600/blueprint.png);
font-size:100%!important;
font-family: 'Open Sans Condensed', sans-serif;
text-align:center;
clear:both;
overflow:hidden;
margin:5px 0 0;
padding:17% 10% 6%;
}
a.comment-bubble {
color:#fff;
text-decoration:none;
font-size:110%;
right:10px;
position:absolute;
top:165px;
text-shadow:1px 2px 1px #333;
font-family: 'Pacifico', cursive;
}
a.comment-bubble:before {
content: "Comments: " url(https://blogger.googleusercontent.com/img/b/R29vZ2xl/AVvXsEiZGWqoF9N8DmIHQCCsUwoDmp1cwPXwCFE8VOsSEtwkUE_88nIDd6cEm7aX0iEYOwQL9mwkQqPb7-WFEIg0MlJcsHLVVx4q6FU9iA-wH-oUHHMzBWU5sHxfV-vVC4Lxh9g9eW5mn6JI9wKR/s1600/heart-active.png);
}
.post-header,.post-footer {
display:none;
}
</style></b:if></b:if>
<link href='http://fonts.googleapis.com/css?family=Open+Sans+Condensed:300' rel='stylesheet' type='text/css'/>
<link href='http://fonts.googleapis.com/css?family=Pacifico' rel='stylesheet' type='text/css'/>
Grid Layout with Text Snippet on Hover
<b:if cond='data:blog.pageType != "static_page"'>
<b:if cond='data:blog.pageType!= "item"'>
<style>
#blog-pager {
clear:both;
}
.post {
height:auto;
width:31%;
display:inline-block;
text-decoration:none;
float:left;
margin:0 1.1% 2%;
padding:0!important;
}
h3.post-title a {
font-size:95%;
font-family: 'Open Sans Condensed', sans-serif;
text-transform:uppercase;
color:#fff;
padding:0;
text-shadow: 2px 2px 3px #222;
}
h3.post-title {
height: 22px;
text-align:center;
position:absolute;
top:1%;
width:100%;
z-index:101;
overflow:hidden;
margin:0!important;
padding:10px 0;
}
.date-header {
visibility:hidden;
height:0!important;
width:0!important;
margin:0!important;
padding:0!important;
}
.posts-thumb {
width:100%!important;
height:190px!important;
overflow:hidden;
clear:both;
}
.post-body {
border-radius:2px;
box-shadow:0 5px 4px 1px rgba(0,0,0,0.1);
position:relative;
overflow: hidden;
}
.post-body a {
text-decoration: none;
}
.post-body img {
display:block;
width:100%!important;
height:auto!important;
max-width:800px!important;
max-height:400px!important;
min-width:190px!important;
min-height:190px!important;
border:none;
outline:none;
position:relative;
margin: 0px;
padding:0;
}
.post-summary-text {
cursor: pointer;
background-color: rgba(44, 77, 163, 0.8);
color:#fff;
font-size:120%!important;
font-family: 'Open Sans Condensed', sans-serif;
clear:both;
overflow:hidden;
padding:25% 10% 0%;
left: 0;
position: absolute;
text-align: center;
vertical-align: bottom;
text-shadow: 1px 1px 0 rgba(0, 0, 0, 0.1);
top: 0;
transform: scale(1);
opacity: 0;
z-index: 10;
height: 100%;
transition: all 300ms ease-out 0s;
}
.post-summary-text:hover {
opacity: 1;
}
a.comment-bubble {
color:#fff;
text-decoration:none;
font-size:100%;
width: 100%;
text-align: center;
position:absolute;
top:165px;
left: 0px;
text-shadow:1px 2px 1px #333;
font-family: 'Pacifico', cursive;
z-index: 122;
}
a.comment-bubble:before {
content: "Comments: ";
}
.post-header,.post-footer {
display:none;
}
</style></b:if></b:if>
<link href='http://fonts.googleapis.com/css?family=Open+Sans+Condensed:300' rel='stylesheet' type='text/css'/>
<link href='http://fonts.googleapis.com/css?family=Pacifico' rel='stylesheet' type='text/css'/>
Masonry Layout (Pinterest Like Grid)
<b:if cond='data:blog.pageType != "static_page"'>
<b:if cond='data:blog.pageType!= "item"'>
<style>
#blog-pager {
clear: both;
position: absolute;
bottom: 0px;
left: 0px;
}
.blog-feeds {
display: none;
}
.post {
height: auto;
width: 100%;
padding: 0px !important;
margin: 0px 0px 30px;
display: inline-block;
text-decoration: none;
}
h3.post-title a{
font-size: 95%;
font-family: 'Open Sans Condensed', sans-serif;
text-transform: uppercase;
padding: 0px;
color: #fff;
text-shadow: 3px 2px 2px #222;
font-weight: bold;
}
h3.post-title, .comments h4 {
margin: 0px !important;
text-align: center;
padding: 10px 0px;
position: absolute;
top: 10px;
width: 100%;
z-index: 200;
}
.post-header {
display: none;
}
.date-header {
visibility: hidden;
height: 0px !important;
width: 0px !important;
padding: 0px !important;
margin: 0px !important;
}
.posts-thumb {
width: 100%;
height: auto;
overflow: hidden;
clear: both;
}
.post-body {
overflow: hidden;
position:relative;
}
.post-body a {
text-decoration: none;
}
.post-body img {
display: block;
width: auto;
height: auto;
max-width: 100%;
max-height: none;
min-width: 100%;
min-height: auto;
margin: 0px;
padding: 0;
border: none;
outline: none;
position: relative;
}
.post-summary-text {
cursor: pointer;
background-color: rgba(44, 77, 163, 0.8);
color:#fff;
font-size:120%!important;
font-family: 'Open Sans Condensed', sans-serif;
clear:both;
overflow:hidden;
padding:25% 10% 0%;
left: 0;
position: absolute;
text-align: center;
vertical-align: bottom;
text-shadow: 1px 1px 0 rgba(0, 0, 0, 0.1);
top: 0;
transform: scale(1);
opacity: 0;
z-index: 10;
height: 100%;
transition: all 300ms ease-out 0s;
}
.post-summary-text:hover {
opacity: 1;
}
.post-footer {
display: none;
}
a.comment-bubble {
color: #fff;
text-decoration: none;
font-size: 120%;
right: 5px;
z-index: 222;
position: absolute;
top: 5px;
text-shadow: 1px 2px 1px #333;
font-family: 'Open Sans Condensed', sans-serif;
}
a.comment-bubble:before {
content: url(https://blogger.googleusercontent.com/img/b/R29vZ2xl/AVvXsEiZGWqoF9N8DmIHQCCsUwoDmp1cwPXwCFE8VOsSEtwkUE_88nIDd6cEm7aX0iEYOwQL9mwkQqPb7-WFEIg0MlJcsHLVVx4q6FU9iA-wH-oUHHMzBWU5sHxfV-vVC4Lxh9g9eW5mn6JI9wKR/s1600/heart-active.png);
}
.main-inner .column-center-inner {
-moz-column-count: 3;
-moz-column-gap: 1px;
-webkit-column-count: 3;
-webkit-column-gap: 1px;
column-count: 3;
column-gap: 1px;
width: 100%;
padding: 0px !important;
}
</style></b:if></b:if>
<link href='http://fonts.googleapis.com/css?family=Open+Sans+Condensed:300' rel='stylesheet' type='text/css'/>
Please note that the masonry layout might not work if you have a customized template, also older posts will appear vertically (from top to bottom) instead of left to right.
Step 8. Click "Preview" and if everything looks fine, press the "Save Template" button.
That's it!
Implementing a grid style view has its pros and cons, but the benefits clearly outweigh the disadvantages. The fact that a website will look visually appealing and professional when set in grid style, is already enough to boost its online reputation. An increase in page views is just the beginning. With the right images and content, a blog will also have better SEO. Most importantly, implementing the changes is not as complex as some might think. With a step-by-step guide available, adding a dynamic view switcher would be completed in no time.Thứ Ba, 17 tháng 2, 2015
How to Track Invalid Adsense Clicks Using StatCounter
A lot of things can happen online, some of which are beyond your control. One of these is invalid click activities that are caused by a number of things, but can lead you into one unfortunate situation - getting banned from AdSense for good. Since you need AdSense to keep track of your website's performance, you should do anything possible to protect yourself against invalid clicks.
StatCounter can help you in this mission. This is a web traffic analysis tool that lets you track all clicks and exit links. Through it, you will know where a majority of your invalid clicks are coming from, and the corresponding IPs that you can then block to protect your AdSense account.
Getting started is as easy as signing up and creating an account. You can then create a new project for a website that you want to track. Like most analytics tools, StatCounter is fairly easy to use. Make sure to select a counter or Invisible tracking, and opt to receive reports in a weekly or monthly basis, so that you can keep an eye on invalid AdSense clicks.

After entering the appropriate information, press the "Add Project" button which will take you to the "Choose an installation Guide for your website" page - here click the "Default Installation Guide" link. Now, StatCounter will give you a code along with instructions on how to install this code on your website. After adding the code, press the "Check Installation" button on the right toward the bottom of the page in order to finish the installation process.
Click on Stats and click on the menu called "Exit Link Activity". This will show all the links that visitors clicked on to leave your website. Here, you can also find Date, Time, Exit Link Clicked and the page on which the exit link was clicked.

The exit link could be a advertisement or a link to other website. To display only the clicks on the AdSense ads, use the "Exit Link Match" filter to 'google adsense'. This way, you will be able to see how many clicks are there on advertisements and at what time the click was made.
To see even more information about a particular visitor who clicked on the link, click on the magnify icon. This will show you the Search Referral, IP Address of the visitor, Host Name, their Location, how many times they've visited your blog before, Visit Length, Browser, OS, Resolution, ISP, and the pages they viewed including the exit links.

So this is how you can track the invalid AdSense clicks using StatCounter. Although you may have to disable advertisements on your website temporarily to avoid a potentially disastrous situation, such as being click bombed, it is a better alternative than being kicked out of AdSense permanently. Through StatCounter, you will be able to detect invalid clicks or any suspicious activities that will inflate the number of clicks on an ad. Since you can't control an advertiser or publisher's desire to increase their earnings, you should monitor click through rates or the cost per clicks you are making. If there is a sudden increase of clicks but you make zero CPC, it's time to track down on these invalid Adsense clicks and put a stop to them.
StatCounter can help you in this mission. This is a web traffic analysis tool that lets you track all clicks and exit links. Through it, you will know where a majority of your invalid clicks are coming from, and the corresponding IPs that you can then block to protect your AdSense account.
Getting started is as easy as signing up and creating an account. You can then create a new project for a website that you want to track. Like most analytics tools, StatCounter is fairly easy to use. Make sure to select a counter or Invisible tracking, and opt to receive reports in a weekly or monthly basis, so that you can keep an eye on invalid AdSense clicks.
After entering the appropriate information, press the "Add Project" button which will take you to the "Choose an installation Guide for your website" page - here click the "Default Installation Guide" link. Now, StatCounter will give you a code along with instructions on how to install this code on your website. After adding the code, press the "Check Installation" button on the right toward the bottom of the page in order to finish the installation process.
Tracking Exit Links
Once you have added StatCounter to your website, your reports will be available within minutes. Now let's see how to track invalid AdSense Clicks using StatCounter.Click on Stats and click on the menu called "Exit Link Activity". This will show all the links that visitors clicked on to leave your website. Here, you can also find Date, Time, Exit Link Clicked and the page on which the exit link was clicked.
The exit link could be a advertisement or a link to other website. To display only the clicks on the AdSense ads, use the "Exit Link Match" filter to 'google adsense'. This way, you will be able to see how many clicks are there on advertisements and at what time the click was made.
To see even more information about a particular visitor who clicked on the link, click on the magnify icon. This will show you the Search Referral, IP Address of the visitor, Host Name, their Location, how many times they've visited your blog before, Visit Length, Browser, OS, Resolution, ISP, and the pages they viewed including the exit links.
So this is how you can track the invalid AdSense clicks using StatCounter. Although you may have to disable advertisements on your website temporarily to avoid a potentially disastrous situation, such as being click bombed, it is a better alternative than being kicked out of AdSense permanently. Through StatCounter, you will be able to detect invalid clicks or any suspicious activities that will inflate the number of clicks on an ad. Since you can't control an advertiser or publisher's desire to increase their earnings, you should monitor click through rates or the cost per clicks you are making. If there is a sudden increase of clicks but you make zero CPC, it's time to track down on these invalid Adsense clicks and put a stop to them.
4 Ways to Detect Invalid Activity in Google AdSense
Monitoring your website's performance shouldn't be a chore but a necessity. After all, how else will you know how to serve your audience better - and acquire new ones - if you don't know how they get to you, what they do on your site and who they are? Google Analytics is a tool that does all that, but despite its sophistication, your account can be suspended for invalid activity.
This is the one thing that you have to avoid because the process of reinstating your account may take a while. That said, how can you detect invalid activity?
Before answering the question, here are some terms that you need to familiarize yourself with as they will appear throughout the rest of this post:

2. You have a lot of clicks but no CPC. As in, your assigned CPC is 0.00. For example, if you get about 50 clicks and don't have a CPC set, that tells Google that something funky is going on and they will not hesitate to take action. Keep in mind that they do take matters like this seriously, and which is why they employ both human and machine checking to analyze clicks and impressions.
3. You're estimated earnings rise then fall suddenly. For example, you get estimated earnings of $1.00 but the next minute this drops to $0.0. Whether it drops to zero or half the original estimated earnings amount after you refreshed the page, you know that something is up.
4. You have many clicks from one country but less pageviews. Google operates on the belief that if a user clicked on an ad, they are interested in what it has to say. So, if the pageviews are really low, that sends a wrong signal to Google and causes them to think that something fishy is happening.
So, make sure to check your AdSense performance regularly so you can spot discrepancies and address them as soon as possible before Google decides to suspend your account.
This is the one thing that you have to avoid because the process of reinstating your account may take a while. That said, how can you detect invalid activity?
Before answering the question, here are some terms that you need to familiarize yourself with as they will appear throughout the rest of this post:
DEFINITIONS
- Clicks - number of times a user has clicked on your advertisements
- CPC - cost per click; what you get whenever a user clicks on your ads
- Pageviews - refers to the action the user takes of viewing a page with an ad displayed
- CTR - click through rate; calculated as (clicks / pageviews) x 100 and is given in percentage
- Estimated Earnings - calculated as (clicks x CPC); the value goes up or gown while the earnings are still in verification process
WAYS TO DETECT INVALID ACTIVITY
1. You have a CTR above 20%. The normal range for CTR is 1% to 11%, but anything above these tells Google that there is something iffy and that may not bode well for you. So, if you notice this, make necessary changes so that you maintain a healthy CTR.2. You have a lot of clicks but no CPC. As in, your assigned CPC is 0.00. For example, if you get about 50 clicks and don't have a CPC set, that tells Google that something funky is going on and they will not hesitate to take action. Keep in mind that they do take matters like this seriously, and which is why they employ both human and machine checking to analyze clicks and impressions.
3. You're estimated earnings rise then fall suddenly. For example, you get estimated earnings of $1.00 but the next minute this drops to $0.0. Whether it drops to zero or half the original estimated earnings amount after you refreshed the page, you know that something is up.
4. You have many clicks from one country but less pageviews. Google operates on the belief that if a user clicked on an ad, they are interested in what it has to say. So, if the pageviews are really low, that sends a wrong signal to Google and causes them to think that something fishy is happening.
So, make sure to check your AdSense performance regularly so you can spot discrepancies and address them as soon as possible before Google decides to suspend your account.
Thứ Hai, 12 tháng 1, 2015
Using the AdSense Access and Authorization Feature
It is amazing when you see a webmaster using a blogspot blog stealing an AdSense Java Script Code and using it on their website. They will usually keep your unique publisher ID while showing ads from your account. While their action may be unintentional in terms of them not caring which ID that they use, the net effect is that you are now involved in their illegal action.
 Whatever their reason for doing so, once they are caught and banned for using illegal and plagiarized materials, chances are that Google will also ban your Adsense account as well because it violates the terms of service and the program polices even though you may not have been aware that this happened to you. It doesn't really matter to Google because they see your unique publisher ID and assume that it is you posting the illegal materials.
In addition, there are websites that also use the iFrame HTML program that will embed to the post and pages of your website as well. This means that you are now violating the Terms of Services as well as the Program Policies because they are showing the AdSense ads inside an iFrame which is forbidden. Again, because it is your website, Google will assume that it is you unless you can take appropriate action.
While this may seem unfair, it must be noted that Google has recognized the practices of others in using the websites and unique publisher ID, so they have developed a new feature called "Access and Authorization" that you can find within the dashboard of AdSense. It is here that you can only allow certain sites to show ads for your account and not have to worry about getting punished for something that you did not do.

Here, you will need to type in all the websites or domains that you have granted permission and save the changes you have made by clicking the "Save" button. While it may be tempting to not list any, you will need to list the following in order to fully comply with the request and not create any more confusion:
- Your Domains: Any domains and sub-domains that you own where you want to monetize them with AdSense.
- Country Specific TLDs: Basically, any country-specific TLDs of Google will need to be included as well, for example a .blogspot.com blog (see the screenshot below). To find a complete list of all Google domains, click HERE.
- Translate Site: If some of your customers are using translation sites to visit your website, then you'll want to at least include the major ones such as Google Translate and others. You can find a list of the major ones or stick to Google if you like.
- Yahoo & Bing Domains and Sub-Domains: Wherever your articles are being read, you'll need to include these sites as well.
- Articles: If you are using articles from other websites that have your ad code and you have promised to share your AdSense revenue with the parties involved, then you will need to enter all of the article URL codes separately in order to make sure that they are authorized.

If you were to use a domain name that is not on your list of authorized websites, but it does use your ad code, then you will see alerts on your dashboard to notify you. If these are legitimate sites that you want to use your ad code, but simply did not put them on the list you can do so thanks to the warning provided on your dashboard:
Also, keep in mind that any domain name that is using your ad code and is not authorized will remain in place and not generate any money for you. So, you cannot profit by the theft of others even when they are using your ad code. While this may seem unfair in a sense, the way the process works does keep your website from being punished for what someone else has done.
Remember that any partner websites of Adsense such as youtube.com, blogspot.com, blogger.com etc. are fully authorized to show your ads without having to add them to your account listing. All partner websites of AdSense qualify, so you only need to restrict yourself to the sites that are outside that particular area.
When you add a domain to your list of sites that are authorized to use your ad code, they will automatically be added to your list of sites that you own as well. This means that you don't have to add them twice and can limit your efforts to just the first authorization part.
You'll want to use this feature in order to avoid any misunderstanding and especially to avoid being punished for something that you did not do. However, you'll need to prepare a bit before entering all of the applicable domains that can use your ad code. By taking a little time and going over all the places where they appear, you can add them in and get the greatest benefit from this particular feature of AdSense.
If you have any more questions, you might also try posting them here in the Adsense help forums.
In addition, there are websites that also use the iFrame HTML program that will embed to the post and pages of your website as well. This means that you are now violating the Terms of Services as well as the Program Policies because they are showing the AdSense ads inside an iFrame which is forbidden. Again, because it is your website, Google will assume that it is you unless you can take appropriate action.
While this may seem unfair, it must be noted that Google has recognized the practices of others in using the websites and unique publisher ID, so they have developed a new feature called "Access and Authorization" that you can find within the dashboard of AdSense. It is here that you can only allow certain sites to show ads for your account and not have to worry about getting punished for something that you did not do.
Access and Authorization Usage
You will need to log into your AdSense account and then proceed to "Site Authorization" which will then let you check the mark to allow only certain ads to be shown for your account. When you check the box that allows only certain sites, it will ask you which domains that you are allowing to show on your website and what has permission to use your ad code:Here, you will need to type in all the websites or domains that you have granted permission and save the changes you have made by clicking the "Save" button. While it may be tempting to not list any, you will need to list the following in order to fully comply with the request and not create any more confusion:
- Your Domains: Any domains and sub-domains that you own where you want to monetize them with AdSense.
- Country Specific TLDs: Basically, any country-specific TLDs of Google will need to be included as well, for example a .blogspot.com blog (see the screenshot below). To find a complete list of all Google domains, click HERE.
- Translate Site: If some of your customers are using translation sites to visit your website, then you'll want to at least include the major ones such as Google Translate and others. You can find a list of the major ones or stick to Google if you like.
- Yahoo & Bing Domains and Sub-Domains: Wherever your articles are being read, you'll need to include these sites as well.
- Articles: If you are using articles from other websites that have your ad code and you have promised to share your AdSense revenue with the parties involved, then you will need to enter all of the article URL codes separately in order to make sure that they are authorized.
If you were to use a domain name that is not on your list of authorized websites, but it does use your ad code, then you will see alerts on your dashboard to notify you. If these are legitimate sites that you want to use your ad code, but simply did not put them on the list you can do so thanks to the warning provided on your dashboard:
We've noticed your ad code has appeared on websites you haven't authorized. To avoid lost revenue, make sure to authorize any sites you own to display ads by visiting your account settings.However, if these sites are not authorized, then you can feel comfortable by ensuring that their domain is not on your list and Google will not punish you for the theft by others.
Also, keep in mind that any domain name that is using your ad code and is not authorized will remain in place and not generate any money for you. So, you cannot profit by the theft of others even when they are using your ad code. While this may seem unfair in a sense, the way the process works does keep your website from being punished for what someone else has done.
Additional Notes for Using Access and Authorization on AdSense
There are a number of things that you will need to be aware of when using this particular program. First, be sure that you check it frequently so that you can catch any warning early on. You only need to sign into your account and check the dashboard where the authorization is located. By checking frequently, you can catch those who are authorized and add them to your account.Remember that any partner websites of Adsense such as youtube.com, blogspot.com, blogger.com etc. are fully authorized to show your ads without having to add them to your account listing. All partner websites of AdSense qualify, so you only need to restrict yourself to the sites that are outside that particular area.
When you add a domain to your list of sites that are authorized to use your ad code, they will automatically be added to your list of sites that you own as well. This means that you don't have to add them twice and can limit your efforts to just the first authorization part.
You'll want to use this feature in order to avoid any misunderstanding and especially to avoid being punished for something that you did not do. However, you'll need to prepare a bit before entering all of the applicable domains that can use your ad code. By taking a little time and going over all the places where they appear, you can add them in and get the greatest benefit from this particular feature of AdSense.
If you have any more questions, you might also try posting them here in the Adsense help forums.
Thứ Bảy, 20 tháng 12, 2014
How to Build High Quality Backlinks
One of the secrets to creating more web traffic with your posts is to build in some backlinks. To build high quality backlinks is one of the most popular methods to boost your content over the competition. However, finding the right methods to build the backlinks is going to take a little effort.
Everything starts with understanding what a backlink is and what it will do for your content. From there, you can then extend your efforts to build even more backlinks using creative and effective means that maximizes the potential of your content.

Quality of the backlinks is important because having 10 good ones will beat 200 bad ones in terms of Google rankings. So, you must strive for quality each and every time. However, it will take time to build up backlinks to your articles because people will have to see it and then decide to link to it in order to add more value to their site.
If you look at adding good backlinks as a long term strategy, you will eventually reap the rewards that they offer. What follows are some interesting ways to start building good quality backlinks so that you can start your success today a little bit at a time.
How-To guides often make the best long posts, especially if you can really hit the details so that people will fully understand how to do what you are explaining to them.
With e-Books, you don't have to write very many, but it does help if you create ones that are very useful, highly readable and can be shared so that you can build high quality backlinks.
Remember, you'll need to do some research on your audience to see what type of holidays and content works best for their interest, but Valentine's Day is one that everyone shares, so that is an easy one to write good content, or run a contest that is bound to get good, high quality backlinks.
You can create "how-to" videos or find something interesting to make a video about as long as it relates to the industry in which your business is in. The key is to do something fun and enjoyable for your audience so that they will start sharing it with their friends.
It will take time, effort and the ability to write well. But if you can pull it off, your stint as a guest blogger will pay off big time for your efforts. The key is to write something that attracts people's attention and provides you with a place to write again for the blogger.
Guest blogging can be very rewarding in more ways than one, so if you have the time to do it right, then you should market your services as a guest blogger.
These are just some of the methods you can use to build high quality backlinks and start building up your web traffic.
Everything starts with understanding what a backlink is and what it will do for your content. From there, you can then extend your efforts to build even more backlinks using creative and effective means that maximizes the potential of your content.
What is a Backlink?
A backlink is an incoming hyperlink that connects the web page or content to another website. Backlinks are very important when it comes to page ranking as Google rates them highly. However, the backlinks themselves must be of good quality in order to generate the rankings needed to boost your content ahead of the competition.Quality of the backlinks is important because having 10 good ones will beat 200 bad ones in terms of Google rankings. So, you must strive for quality each and every time. However, it will take time to build up backlinks to your articles because people will have to see it and then decide to link to it in order to add more value to their site.
If you look at adding good backlinks as a long term strategy, you will eventually reap the rewards that they offer. What follows are some interesting ways to start building good quality backlinks so that you can start your success today a little bit at a time.
Create Long, Interesting Posts
One of the easiest ways to start creating good backlinks is by writing a good, long tutorial post that uses images, charts and other graphics to really make it interesting. It will need to be from 1000 to 1200 words long and not have any filler, so the information really needs to be good and tight to make it interesting.How-To guides often make the best long posts, especially if you can really hit the details so that people will fully understand how to do what you are explaining to them.
Participate in Forums
A person who is active in the forums when it comes to the subject that you are writing is building a network of potential fans who might offer high quality backlinks to their work. This is a delicate matter as you don't want to come across as someone only interested in what they can do for you. This will mean offering quality backlinks to those who participate in the forum as well if you find their articles useful and informative.Write e-Books
An e-Book is one of the best ways to help spread the word about your talents and you can ask your friends to share it with the world through social media as well. You can also send your links to the best in social bookmarking sites as well to help augment your efforts.With e-Books, you don't have to write very many, but it does help if you create ones that are very useful, highly readable and can be shared so that you can build high quality backlinks.
Create Special Days
One of the more interesting ways to build high quality backlinks is creating special days like St. Patrick's Day, Halloween or Valentine's Day to offer discounts on your products or services. You can actually build up to the day as well with special writing and content features to help pull in more traffic.Remember, you'll need to do some research on your audience to see what type of holidays and content works best for their interest, but Valentine's Day is one that everyone shares, so that is an easy one to write good content, or run a contest that is bound to get good, high quality backlinks.
Have Free Products
Everyone likes free products and this can help you boost the number of visitors to your website. You can have a free e-Book or even a promotional gift if you want. While it may take some investment, the result will be getting more web traffic which in turn creates more demand for your products or services.Videos
YouTube may very well be the biggest marketing tool of the moment with no signs of slowing down. If you can create a funny, interesting video then you will start getting some great backlinks. Today, the technology to create a solid, professional-looking video is dirt cheap compared to just a decade ago.You can create "how-to" videos or find something interesting to make a video about as long as it relates to the industry in which your business is in. The key is to do something fun and enjoyable for your audience so that they will start sharing it with their friends.
Interact with Other Blogs
When you read a blog or see a video you like that is within your industry, don't just say "good job" and leave it at that. Write a good, interesting comment or review so that you can really share your thoughts. Remember to be positive, articulate and get right to the point. If you can write your thoughts in an entertaining, audience-pleasing way, you can start building up an audience for your comments and reviews.Do Guest Blogging
Want to make a great impression? Find a good place to guest blog and write until you get that post to go viral. This will not only attract you an audience, but by helping out someone else you will build high quality backlinks as well.It will take time, effort and the ability to write well. But if you can pull it off, your stint as a guest blogger will pay off big time for your efforts. The key is to write something that attracts people's attention and provides you with a place to write again for the blogger.
Guest blogging can be very rewarding in more ways than one, so if you have the time to do it right, then you should market your services as a guest blogger.
These are just some of the methods you can use to build high quality backlinks and start building up your web traffic.
What to Do Before Applying for Google AdSense
It seems that everyone wants to make money by joining up with Google AdSense and why not? Google AdSense is a relatively simple, straightforward way to actually start earning some extra money with your efforts.
However, things have changed from the early days of AdSense when joining was not much of an issue. Today, applying for AdSense takes more effort and some preparation so that you can take full advantage of their services.
First, you will need a good reason to apply for AdSense so you can reap the benefits that they offer. Here you will find out more about what Google AdSense is all about, what they offer and how you can properly prepare yourself before joining to really take advantage.


Today, AdSense is one of the most respected thanks to the many thousands of satisfied publishers and customers who use the service. It is straightforward, easy to use and always pays on time which makes it very attractive to anyone wanting to have this service. If you do your work the right way, it will pay better than any other similar service on the web.
However, it is their very success that now makes them harder to join. When you apply, everything has to be just right otherwise you will not be approved.
Read Google Policies: Just like studying for a test, Google posts their policies about what it takes for your site to get into AdSense. So, take the time to read them and be sure that your website follows the rules.
Have Good Content: If your website doesn't have good or sufficient content, it will not be accepted. So, be sure that you provide them with enough to review. In addition, it has to be neat, professional and grammatically correct otherwise it will give them the excuse to toss out your application.
Aesthetically Pleasing: Garish yellows and lots of distracting glitz will also stop you in your tracks when you apply for AdSense. Your website should have a good, solid design that is comfortable to look at and pleasing for the visitor.
Post Your Contact Information: If Google cannot find a way to contact you through your website, you might as well not apply. Having an "About Us" page that is complete with contact info is the minimum to getting accepted.
Now that you've done the basics, it is time to hedge your bets when it comes to applying for AdSense by adding in items and procedures that will enhance your chances. While nothing is guaranteed, the following steps will help your website in getting approved.
When applying for AdSense, you will need to keep all of these things in mind so that you will be accepted. However, all of the attributes that Google AdSense requires are also ones that will boost your website as well. So, keep this in mind when you apply for AdSense because the result will be a blog that will start earning you another income stream that can build over time.
However, things have changed from the early days of AdSense when joining was not much of an issue. Today, applying for AdSense takes more effort and some preparation so that you can take full advantage of their services.
First, you will need a good reason to apply for AdSense so you can reap the benefits that they offer. Here you will find out more about what Google AdSense is all about, what they offer and how you can properly prepare yourself before joining to really take advantage.
What is Google AdSense?
One of the most established internet networks to offer advertisement publishing, AdSense uses the Pay Per Click (PPC) system to help businesses reach out to others on the web. At one time, Google used to provide AdSense to everyone who used their Blogspot program, but now that has changed.Today, AdSense is one of the most respected thanks to the many thousands of satisfied publishers and customers who use the service. It is straightforward, easy to use and always pays on time which makes it very attractive to anyone wanting to have this service. If you do your work the right way, it will pay better than any other similar service on the web.
However, it is their very success that now makes them harder to join. When you apply, everything has to be just right otherwise you will not be approved.
How to Avoid Getting Your Application Rejected
There are a number of things to avoid when applying for AdSense so that your entry will not be discarded. Here are just a few.Read Google Policies: Just like studying for a test, Google posts their policies about what it takes for your site to get into AdSense. So, take the time to read them and be sure that your website follows the rules.
Have Good Content: If your website doesn't have good or sufficient content, it will not be accepted. So, be sure that you provide them with enough to review. In addition, it has to be neat, professional and grammatically correct otherwise it will give them the excuse to toss out your application.
Aesthetically Pleasing: Garish yellows and lots of distracting glitz will also stop you in your tracks when you apply for AdSense. Your website should have a good, solid design that is comfortable to look at and pleasing for the visitor.
Post Your Contact Information: If Google cannot find a way to contact you through your website, you might as well not apply. Having an "About Us" page that is complete with contact info is the minimum to getting accepted.
Now that you've done the basics, it is time to hedge your bets when it comes to applying for AdSense by adding in items and procedures that will enhance your chances. While nothing is guaranteed, the following steps will help your website in getting approved.
10 Ways to Increase Your Chances when Applying for AdSense
1. Policy for Privacy
It may seem odd to have a privacy policy for your blog, but it is vital if you want to get AdSense approval. Without it, you might as well not apply at all. The policy itself should describe to those who visit your blog what they will see and what they can and cannot do.2. Contact Information
This is where you put in your contact information. At the very least, it should consist of an email so that readers can contact you directly about any issue they have on your blog.3. About Us
This is where you tell people a little about who you are, what your business does and how you are going to accomplish it. This is sort of like an introductory page to your efforts and it critical when you apply for Adsense.4. Email & Name Verification
Be sure that you put your email as well as your name in your About Me or Contact Us page so that it will help Google verify you quickly.5. Verify Age
Always use your correct name and date of birth when applying for AdSense. This is mostly for those who are under 18, but it is important to be truthful otherwise you'll never get approved.6. Appropriate Design
Your blog should look attractive, professional and easy to use. You don't have to be fancy or pour in thousands of dollars, just make it clean and neat will be sufficient.7. Have Plenty of Posts
Do you know that there is no minimum number of posts stated by Google in terms of what is required for joining AdSense? Even so, if you only have a handful, do not count on getting approved. You should shoot for about 500 or so before applying to demonstrate your seriousness about your efforts and make sure that they are at least 500 words in length.8. Remember the Rules
No pornography, illegal items, advocating drug use or other items that will not get you any AdSense at all. Plus, if your posts are all less than 200 words, that will not work either.9. Adds Value
Your blog or website must provide real value for your audience. This will not only help keep people visiting your site, but it will also impress Google as well.10. Unique, Top Level Domain
Basically, this means that your domain should be a ".com" in order to succeed. Plus, the name itself needs to be short as possible, related to your area of interest and easy to remember.When applying for AdSense, you will need to keep all of these things in mind so that you will be accepted. However, all of the attributes that Google AdSense requires are also ones that will boost your website as well. So, keep this in mind when you apply for AdSense because the result will be a blog that will start earning you another income stream that can build over time.
Thứ Hai, 15 tháng 12, 2014
Show/Hide Blogger and Google+ Comments System With Toggle
Many Blogger site owners received the new Google+ Comment System pretty negatively because it forced all commenting users to create their own Google+ account before they were able to write a comment. The Google+ Comment System on Blogger was convenient to writers, but discouraged many users from continuing to comment on blogs because they simply didn't want to use Google+. For those that did use Google+ to make a comment, Blogger would never email you and notify you that someone left a comment; you could go days or weeks without ever realizing that you never responded to a reader.
In addition to frustrating your audience, the Google+ Comment System on Blogger depended upon the URL of your blog post. By changing your URLs or moving around your blog posts internally, you run the risk of losing every one of your comments that was placed using Google+.
Previously, the only way to solve this problem was to disable the comment system through your account settings, thus giving up your ability to use their Google+ account. Now, there's an easy new way to have the best of both worlds. Allowing fans of Google+ as well as everyday blog readers to access all same features, you’ll be able to engage every visitor equally. You can respond to comments while still being able to communicate with other Google+ users outside of your site and take advantage of the Google+ Comment System on Blogger.

Step 1. Log into your Blogger account and select your blog > go to 'Template' and press the 'Edit HTML' button on the right side.

Step 2. Click anywhere inside the code area and press CTRL + F keys to open the editor's search box and search for the following code:
Step 4. Press the "Save Template" button located at the top of the editor and view your blog to see if you have successfully added Google+ commenting system to Blogger.
Please note that in order to make this work, you need to make sure that you are using a version of jQuery in your site. Otherwise, add this line just above the </head> tag using the HTML template editor:
In addition to frustrating your audience, the Google+ Comment System on Blogger depended upon the URL of your blog post. By changing your URLs or moving around your blog posts internally, you run the risk of losing every one of your comments that was placed using Google+.
Previously, the only way to solve this problem was to disable the comment system through your account settings, thus giving up your ability to use their Google+ account. Now, there's an easy new way to have the best of both worlds. Allowing fans of Google+ as well as everyday blog readers to access all same features, you’ll be able to engage every visitor equally. You can respond to comments while still being able to communicate with other Google+ users outside of your site and take advantage of the Google+ Comment System on Blogger.
How to Integrate Blogger and Google Plus Comments
To make the installation as simple as possible, I used inline jQuery and CSS, but who wants can change this code later. Also, the most accessible place I found to add it would be just after <b:include data='post' name='post'/>. So, let's start adding it:Step 1. Log into your Blogger account and select your blog > go to 'Template' and press the 'Edit HTML' button on the right side.
Step 2. Click anywhere inside the code area and press CTRL + F keys to open the editor's search box and search for the following code:
<b:include data='post' name='post'/>Step 3. Just after <b:include data='post' name='post'/> add the following code:
<b:if cond='data:blog.pageType == "item"'>Note: The data-width is for setting the width of the comment box, so the number (550) indicated there can be changed according to the design of your blog.
<style>#comments, #gplus-comments-visibility {display:none;} .comments-icons {background: url(https://blogger.googleusercontent.com/img/b/R29vZ2xl/AVvXsEgFharhASqK7xQS5AWOEfB4ZvCx73Io87DUOEqEjUuTMNvnTIBW_xlpmP1QfArbsCMJk5tTpcuNOWPbR0aI8OvCg6EYtw04BEOGffjXoz4osxwiEX_CX3eZ4vC4nqhMUa3Mk2rZc57rqPw_/s1600/speech-bubble.png) no-repeat; font-size: 20px; font-family: "Arial Narrow",Arial,sans-serif; color: #555; font-weight: bold; padding: 18px 15px 0; height: 70px; } .comments-icons a img {vertical-align: middle;}</style>
<div class='comments-icons'>
Show Comments: <a class='show-hide-comments' href='javascript:void();' onclick='$("#gplus-comments-visibility").slideToggle();$("#comments").hide();'><img class='gplus-icon' height='35' src='https://blogger.googleusercontent.com/img/b/R29vZ2xl/AVvXsEg3ZozLqG79yJgcrZVzPUn4dP-BzMTOgo11oicLUbHYMLJ2GdHhP1Ib9Uv4cuV6fXt1QltBIBzmG5YaZJRdL8nKOpYMx5Jvh5UUzMFmeZ4O9yCCrj5g4M2vbOqutrs7C0UNJYGL39KAWC1S/s1600/google-plus-logo.png' width='35'/></a> OR <a class='show-hide-comments' href='javascript:void();' onclick='$("#comments").slideToggle();$("#gplus-comments-visibility").hide();'><img class='blogger-icon' height='35' src='https://blogger.googleusercontent.com/img/b/R29vZ2xl/AVvXsEiCWMVShstxnbt205wUbMV2j9farRqCEsbmkVzlUeWxOmzBG5S687QTMbW6ATkq3q48F9EIUZDlcbNiyvbaQgPm1JZMAiaXQOaYRfBIHySEgZWoWRr1nYIauALFLbeO08Fgiw8FCj0x10A-/s1600/blogger-logo.png' width='35'/></a>
</div>
<div id='gplus-comments-visibility'>
<div class='g-comments' data-first_party_property='BLOGGER' data-view_type='FILTERED_POSTMOD' data-width='550' expr:data-href='data:post.url'/>
</div>
</b:if>
Step 4. Press the "Save Template" button located at the top of the editor and view your blog to see if you have successfully added Google+ commenting system to Blogger.
Please note that in order to make this work, you need to make sure that you are using a version of jQuery in your site. Otherwise, add this line just above the </head> tag using the HTML template editor:
<script src='https://ajax.googleapis.com/ajax/libs/jquery/1.6.4/jquery.min.js' type='text/javascript'/>
That's it!
From here on out, any reader that views your post has the option of making a comment using their Google+ account, or the native Blogger comments. Your readers will enjoy the flexibility that your site provides and you will also benefit from the inclusive services offered by Google.Thứ Tư, 3 tháng 12, 2014
Facebook Popup Like Box Widget For Blogger
Facebook has become the leading social media service on the Internet playing host to over 1.3 billion users; of those, 800 million login to their dashboard feeds at least once a day. Thanks to the vast number of active users on services like Facebook, acquiring new readers as a blogger or content provider has become easier than ever.
In order to produce an effective digital campaign, you absolutely must take advantage of social media by doing things like integrating Facebook on Blogger. Email marketing can be useful, but it comes with restrictions that could limit your blog's potential. Perhaps the most significant problem is that emails don't come with a face or personality like Facebook does.
Think of a time when you received an email in you inbox from someone you didn't know. Where you inclined to open it or did you send it right to the junk folder? If it's your first introduction to new consumer, they simply don't know who you are, what you want, and how you got their email. This sets off an initial breakdown of any type of trust that might have developed. The reputation of email marketing is further deteriorated with a study done by Kaspersky Lab, an Internet research firm. They estimate that around 70% of all the emails sent in the world are spam.
Sharing site content using a Facebook Like Box is just one of many strategies that can generate a regular flow of traffic from a diverse demographic that might have been previously inaccessible. Adding a Facebook Like Box to your site helps to reduces your individual workload, and instead distributes that ability equally among your readers.
When someone reads your content and appreciates the kind of work that you produce, they'll be willing to share that information to their followers and fans, setting off a viral reaction. The first step necessary to making this a reality is to make this change to your site. These next few steps will provide you with a quick and easy guide on how to add a 'Like Box' to your Blogger site so that you can began taking advantage of these great opportunities.

Click here for a DEMO
2. Once the popup window is open, select the HTML/JavaScript gadget from the list:

3. Copy and paste the following code inside the empty box:
If you don't see the Facebook Like Box on the page, you may need to delete your cookies or check out the 'Customization' section above in order to display the widget every time a user visits your site. Once this widget is added to your site, all your hard work should start to translate into an increase in web traffic and number of Facebook fans.
In order to produce an effective digital campaign, you absolutely must take advantage of social media by doing things like integrating Facebook on Blogger. Email marketing can be useful, but it comes with restrictions that could limit your blog's potential. Perhaps the most significant problem is that emails don't come with a face or personality like Facebook does.
Think of a time when you received an email in you inbox from someone you didn't know. Where you inclined to open it or did you send it right to the junk folder? If it's your first introduction to new consumer, they simply don't know who you are, what you want, and how you got their email. This sets off an initial breakdown of any type of trust that might have developed. The reputation of email marketing is further deteriorated with a study done by Kaspersky Lab, an Internet research firm. They estimate that around 70% of all the emails sent in the world are spam.
Sharing site content using a Facebook Like Box is just one of many strategies that can generate a regular flow of traffic from a diverse demographic that might have been previously inaccessible. Adding a Facebook Like Box to your site helps to reduces your individual workload, and instead distributes that ability equally among your readers.
When someone reads your content and appreciates the kind of work that you produce, they'll be willing to share that information to their followers and fans, setting off a viral reaction. The first step necessary to making this a reality is to make this change to your site. These next few steps will provide you with a quick and easy guide on how to add a 'Like Box' to your Blogger site so that you can began taking advantage of these great opportunities.
How to Add the Facebook Popup Like Box Widget
1. Log into your Blogger account and select your blog > go to 'Layout' & click the 'Add a Gadget' link on the right side2. Once the popup window is open, select the HTML/JavaScript gadget from the list:
3. Copy and paste the following code inside the empty box:
<script src='http://ajax.googleapis.com/ajax/libs/jquery/1.7.2/jquery.min.js' type='text/javascript'></script>4. Press the 'Save' button to add the widget to your blog. That's it!
<style>
#fbox-background {
display: none;
background: rgba(0,0,0,0.8);
width: 100%;
height: 100%;
position: fixed;
top: 0;
left: 0;
z-index: 99999;
}
#fbox-close {
width: 100%;
height: 100%;
}
#fbox-display {
background: #eaeaea;
border: 5px solid #828282;
width: 340px;
height: 230px;
position: absolute;
top: 32%;
left: 37%;
-webkit-border-radius: 5px;
-moz-border-radius: 5px;
border-radius: 5px;
}
#fbox-button {
float: right;
cursor: pointer;
position: absolute;
right: 0px;
top: 0px;
}
#fbox-button:before {
content: "CLOSE";
padding: 5px 8px;
background: #828282;
color: #eaeaea;
font-weight: bold;
font-size: 10px;
font-family: Tahoma;
}
#fbox-link,#fbox-link a.visited,#fbox-link a,#fbox-link a:hover {
color: #aaaaaa;
font-size: 9px;
text-decoration: none;
text-align: center;
padding: 5px;
}
</style>
<script type='text/javascript'>
//<![CDATA[
jQuery.cookie = function (key, value, options) {
// key and at least value given, set cookie...
if (arguments.length > 1 && String(value) !== "[object Object]") {
options = jQuery.extend({}, options);
if (value === null || value === undefined) {
options.expires = -1;
}
if (typeof options.expires === 'number') {
var days = options.expires, t = options.expires = new Date();
t.setDate(t.getDate() + days);
}
value = String(value);
return (document.cookie = [
encodeURIComponent(key), '=',
options.raw ? value : encodeURIComponent(value),
options.expires ? '; expires=' + options.expires.toUTCString() : '', // use expires attribute, max-age is not supported by IE
options.path ? '; path=' + options.path : '',
options.domain ? '; domain=' + options.domain : '',
options.secure ? '; secure' : ''
].join(''));
}
// key and possibly options given, get cookie...
options = value || {};
var result, decode = options.raw ? function (s) { return s; } : decodeURIComponent;
return (result = new RegExp('(?:^|; )' + encodeURIComponent(key) + '=([^;]*)').exec(document.cookie)) ? decode(result[1]) : null;
};
//]]>
</script>
<script type='text/javascript'>
jQuery(document).ready(function($){
if($.cookie('popup_facebook_box') != 'yes'){
$('#fbox-background').delay(5000).fadeIn('medium');
$('#fbox-button, #fbox-close').click(function(){
$('#fbox-background').stop().fadeOut('medium');
});
}
$.cookie('popup_facebook_box', 'yes', { path: '/', expires: 7 });
});
</script>
<div id='fbox-background'>
<div id='fbox-close'>
</div>
<div id='fbox-display'>
<div id='fbox-button'>
</div>
<iframe allowtransparency='true' frameborder='0' scrolling='no' src='//www.facebook.com/plugins/likebox.php?
href=https://www.facebook.com/pages/Helplogger/120574614736021&width=402&height=255&colorscheme=light&show_faces=true&show_border=false&stream=false&header=false'
style='border: none; overflow: hidden; background: #fff; width: 339px; height: 200px;'></iframe>
<div id="fbox-link">Powered by <a style="padding-left: 0px;" href="http://helplogger.blogspot.com" rel="nofollow">Helplogger</a></div>
</div>
</div>
Customization
- After adding the code, replace the address in blue https://www.facebook.com/pages/Helplogger/120574614736021 with your site's facebook page URL.
- The widget will appear 5 seconds after the page finishes loading. If you want to change this delay, change the number 5000 to a greater or lesser number in this part:
.delay(5000)
- By default, the like box only shows up the first time the user visits your page. If you would like the Facebook box to popup every time the page loads, then remove this line of code:
$.cookie('popup_facebook_box', 'yes', { path: '/', expires: 7 });
- If you want to display only when user visits your homepage, go to 'Template' > hit the 'Edit HTML' button on the right side and search by clicking anywhere inside the code area and pressing the CTRL + F keys for this tag:
</body>Paste the facebook popup widget right above the body tag and make sure to include the conditional tags below:
<b:if cond='data:page.type == "index"'>ADD THE FACEBOOK WIDGET CODE HERE </b:if>After saving your work, you can test out your new feature by returning to one of your old posts which should bring up a little popup widget asking if you'd like to join the site's facebook page.
If you don't see the Facebook Like Box on the page, you may need to delete your cookies or check out the 'Customization' section above in order to display the widget every time a user visits your site. Once this widget is added to your site, all your hard work should start to translate into an increase in web traffic and number of Facebook fans.
Thứ Bảy, 15 tháng 11, 2014
5 Cool Recent Post Widgets for Blogger
For bloggers that pride themselves on always staying up-to-date with new content, a recent post widget for Blogger can be an invaluable tool. A recent post widget for blogger is in many ways similar to a 'breaking news alert' that journalists love to use during their reports, providing the most recent and relevant posts that you have to offer.
Adding a recent post widget for Blogger helps to reduce the dependency on email marketing, because you don't have to send out an email just to let people know you made a new post. Instead, it updates automatically for everyone to see. You can then use this information to design scheduled email newsletters, and take advantage of what's often referred to as the 'Twitter effect' where audiences will regularly check back on your site for the possibility that new posts are available. Without this, you force people to do run their own search for information and content, increasing the likelihood that they'll leave the site and hurt your bounce rate.
Once you've managed to attract visitors to one of your posts using the recent post widget for Blogger, it will continue to act as an accessible secondary resource to navigate around your site. That way, you can avoid having them sifting through old content that might be outdated. If you'd rather show off some of your best posts instead of your most recent posts, you can do that instead, or add that feature to the bar with just a few alterations.
Apart from looking great and taking up minimal space, there are too many benefits for you not to have a recent post widget for Blogger. The best part about these add-ons is that they come in a wide variety of designs that will fit any theme. If you're interested in adding a widget to your site, here are 5 cool recent post widgets that might catch your eye and fit perfectly with your Blogger template:


Step 1. Log in to your Blogger dashboard and click on your blog
Step 2. Go to "Layout" and click the "Add a gadget" link on the right side
Step 3. From the pop-up window, scroll down and select the "HTML/JavaScript" gadget:

Step 4. Paste the code of the chosen widget found below it.
Step 5. Hit the "Save" button... and that's it!
Set a schedule and make sure that you are making regular posts on the blog. These posts will be automatically updated on your widget and readers can view this information whenever they want. Add your recent post widget for Blogger on the every page of the blog or in your template so that these posts can encourage others to continue reading, thus increasing the total time spent on your site.
Adding a recent post widget for Blogger helps to reduce the dependency on email marketing, because you don't have to send out an email just to let people know you made a new post. Instead, it updates automatically for everyone to see. You can then use this information to design scheduled email newsletters, and take advantage of what's often referred to as the 'Twitter effect' where audiences will regularly check back on your site for the possibility that new posts are available. Without this, you force people to do run their own search for information and content, increasing the likelihood that they'll leave the site and hurt your bounce rate.
Once you've managed to attract visitors to one of your posts using the recent post widget for Blogger, it will continue to act as an accessible secondary resource to navigate around your site. That way, you can avoid having them sifting through old content that might be outdated. If you'd rather show off some of your best posts instead of your most recent posts, you can do that instead, or add that feature to the bar with just a few alterations.
Apart from looking great and taking up minimal space, there are too many benefits for you not to have a recent post widget for Blogger. The best part about these add-ons is that they come in a wide variety of designs that will fit any theme. If you're interested in adding a widget to your site, here are 5 cool recent post widgets that might catch your eye and fit perfectly with your Blogger template:
Style #1
<script style="text/javascript" src="http://helplogger.googlecode.com/svn/trunk/helplogger/recentpoststhumbs.js"></script>
<script style="text/javascript">
var posts_no = 5;
var showpoststhumbs = true;
var readmorelink = true;
var showcommentslink = false;
var posts_date = true;
var post_summary = true;
var summary_chars = 70;
</script>
<script src="/feeds/posts/default?orderby=published&alt=json-in-script&callback=showlatestpostswiththumbs"></script>
<a style="font-size: 9px; color: #CECECE; float: right; margin: 5px;" href="http://helplogger.blogspot.com/2014/11/5-cool-recent-post-widgets-for-blogger.html" rel="nofollow">Recent Posts Widget</a>
<noscript>Your browser does not support JavaScript!</noscript>
<link href='http://fonts.googleapis.com/css?family=Ubuntu+Condensed' rel='stylesheet' type='text/css' />
<style type="text/css">
img.recent-post-thumb {width:50px;height:50px;float:right;margin: 5px -5px 0px 0px; border-radius: 100%; padding: 3px;background: #fff}
.recent-posts-container {font-family: 'Ubuntu Condensed', sans-serif; float: left;width: 100%;min-height: 55px;margin: 5px 0px 5px 0px;padding: 0;font-size:12px;}
ul.recent-posts-container {list-style-type: none; background: #fff;padding: 0px; }
ul.recent-posts-container li:nth-child(1n+0) {background: #F49A9A; width: 100%}
ul.recent-posts-container li:nth-child(2n+0) {background: #FCD092; width: 95%}
ul.recent-posts-container li:nth-child(3n+0) {background: #FFF59E; width: 90%;}
ul.recent-posts-container li:nth-child(4n+0) {background: #E1EFA0; width: 85%;}
ul.recent-posts-container li:nth-child(5n+0) {background: #B1DAEF; width: 80%;}
ul.recent-posts-container li {padding:5px 10px;min-height:50px; list-style-type: none; margin: 0px 5px -5px 5px; color: #777;}
.recent-posts-container a { text-decoration:none; }
.recent-posts-container a:hover { color: #222;}
.post-date {color:#e0c0c6; font-size: 11px; }
.recent-post-title a {font-size: 14px;color: #444; font-weight: bold;}
.recent-post-title {padding: 6px 0px;}
.recent-posts-details a{ color: #222;}
.recent-posts-details {padding: 5px 0px 5px; }
</style>
Style #2
<div class="recentpoststyle">
<script src="http://helplogger.googlecode.com/svn/trunk/helplogger/recentposts.js"></script>
<script>
var posts_no = 5;var posts_date = true;var post_summary = true;var summary_chars = 80;</script>
<script src="/feeds/posts/default?orderby=published&alt=json-in-script&callback=showlatestposts">
</script><a style="font-size: 9px; color: #CECECE; float: right; margin: 5px;" href="http://helplogger.blogspot.com/2014/11/5-cool-recent-post-widgets-for-blogger.html" rel="nofollow">Recent Posts Widget</a>
<noscript>Your browser does not support JavaScript!</noscript>
<style type="text/css">
.recentpoststyle {counter-reset: countposts;list-style-type: none;}
.recentpoststyle a {text-decoration: none; color: #49A8D1;}
.recentpoststyle a:hover {color: #000;}
.recentpoststyle li:before {content: counter(countposts,decimal);counter-increment: countposts;float: left;z-index: 2;position:relative;font-size: 20px;font-weight: bold;color: #fff;background: #69B7E2; margin: 15px 5px 0px -6px; padding: 0px 10px; border-radius: 100%;}
li.recent-post-title { padding: 5px 0px;}
.recent-post-title { font-family: "Avant Garde",Avantgarde,"Century Gothic",CenturyGothic,AppleGothic,sans-serif;}
.recent-post-title a {color: #444;font-size: 13px; text-decoration: none; padding: 2px; font-weight: bold;}
.post-date {padding: 5px 2px 5px 30px; font-size: 11px; color: #999; margin-bottom: 5px;}
.recent-post-summ { border-left: 1px solid #69B7E2; color: #777; padding: 0px 5px 0px 20px; margin-left: 11px; font-family: Garamond,Baskerville,"Baskerville Old Face","Hoefler Text","Times New Roman",serif; font-size: 15px;}
</style></div>
Style #3
<script style="text/javascript" src="http://helplogger.googlecode.com/svn/trunk/helplogger/recentpoststhumbs.js"></script>
<script style="text/javascript">
var posts_no = 5;
var showpoststhumbs = true;
var readmorelink = true;
var showcommentslink = true;
var posts_date = true;
var post_summary = true;
var summary_chars = 70;</script>
<script src="/feeds/posts/default?orderby=published&alt=json-in-script&callback=showlatestpostswiththumbs"></script>
<a style="font-size: 9px; color: #CECECE; float: right; margin: 5px;" href="http://helplogger.blogspot.com" rel="nofollow">Recent Posts Widget</a>
<noscript>Your browser does not support JavaScript!</noscript>
<link href='http://fonts.googleapis.com/css?family=Oswald' rel='stylesheet' type='text/css'/>
<style type="text/css">
img.recent-post-thumb {padding:2px;width:65px;height:65px;float:left;margin: 0px 10px 10px; background: #fff; border: 1px solid #69B7E2;}
.recent-posts-container {font-family: 'Oswald', sans-serif; float: left;width: 100%;min-height: 70px;margin: 5px 0px 5px 0px;padding: 0;font-size:12px;}
ul.recent-posts-container li {padding:5px 0px;min-height:65px; list-style-type: none; margin-bottom: 5px;}
ul.recent-posts-container {counter-reset: countposts;list-style-type: none;}
ul.recent-posts-container li:before {content: counter(countposts,decimal);counter-increment: countposts;z-index: 2;position:absolute; left: 15px; font-size: 13px;font-weight: bold;color: #fff;background: #69B7E2;padding: 4px 10px; border-radius: 100%;}
.recent-posts-container a { text-decoration:none; }
.recent-post-title a {font-size: 13px; text-transform: uppercase; color: #2aace3;}
.recent-posts-details {margin: 5px 0px 0px 92px; }
.recent-posts-details a{ color: #777;}
</style>
Style #4
<script style="text/javascript" src="http://helplogger.googlecode.com/svn/trunk/helplogger/recentposts2.js"></script>
<script style="text/javascript">
var posts_no = 5;
var showpoststhumbs = false;
var readmorelink = true;
var showcommentslink = true;
var posts_date = true;
</script>
<script src="/feeds/posts/default?orderby=published&alt=json-in-script&callback=showlatestpostswiththumbs"></script>
<a style="font-size: 9px; color: #CECECE; float: right; margin: 5px;" href="http://helplogger.blogspot.com">Recent Posts Widget</a>
<noscript>Your browser does not support JavaScript!</noscript>
<link href='http://fonts.googleapis.com/css?family=Oswald' rel='stylesheet' type='text/css'/>
<style type="text/css">
img.recent-post-thumb {padding: 2px; width:35px;height:35px;float:right;margin: -14px 0px 0px 5px; border: 1px solid #cea5ac; border-radius: 10%;}
.recent-posts-container {font-family: 'Oswald', sans-serif; float: left;width: 100%;min-height: 70px;margin: 5px 0px 5px 0px;padding: 0;font-size:12px;}
ul.recent-posts-container li {padding:5px 0px;min-height:65px; list-style-type: none; margin: 0px 10px 5px 35px;}
ul.recent-posts-container {counter-reset: countposts;list-style-type: none;}
ul.recent-posts-container li:before {content: counter(countposts,decimal);counter-increment: countposts;z-index: 2;position:absolute; left: 5px; font-size: 16px;color: #4D4D4D;background: #F7F7F7;padding: 9px 14px; border: 1px solid #efefef;}
.recent-posts-container a { text-decoration:none; }
.recent-posts-container a:hover{color: #4DACE3;}
.post-date {color:#e0c0c6; font-size: 11px; }
.recent-post-title a {font-size: 13px; text-transform: uppercase; color: #5C4D4D;}
.recent-post-title { margin: 5px 0px; }
.recent-posts-details {border-top: 4px solid #AC707A; margin-top: 5px; padding-top: 5px;}
.recent-posts-details a{ color: #888;}
a.readmorelink {color: #4DACE3;}
</style>
Style #5
<script style="text/javascript" src="https://helplogger.googlecode.com/svn/trunk/helplogger/recentposts2.js"></script>
<script style="text/javascript">
var posts_no = 5;
var showpoststhumbs = true;
var readmorelink = true;
var showcommentslink = true;
var posts_date = true;
</script>
<script src="/feeds/posts/default?orderby=published&alt=json-in-script&callback=showlatestpostswiththumbs" rel="nofollow"></script>
<a style="font-size: 9px; color: #CECECE; float: right; margin: 5px;" href="http://helplogger.blogspot.com/2014/11/5-cool-recent-post-widgets-for-blogger.html" rel="nofollow">Recent Posts Widget</a>
<noscript>Your browser does not support JavaScript!</noscript>
<link href='http://fonts.googleapis.com/css?family=Lobster|Gloria+Hallelujah' rel='stylesheet' type='text/css' />
<style type="text/css">
img.recent-post-thumb {width:50px;height:50px;float:right;margin: -4px -35px 0px 0px; border: 4px solid #FCD6CB; border-radius: 100%;}
.recent-posts-container {font-family: 'Gloria Hallelujah', cursive; float: left;width: 100%;min-height: 55px;margin: 5px 0px 5px 0px;padding: 0;font-size:12px;}
ul.recent-posts-container {counter-reset: countposts;list-style-type: none; background: #fff; }
ul.recent-posts-container li:before {content: counter(countposts,decimal);counter-increment: countposts;z-index: 2;position:absolute; left: -20px; font-size: 16px;color: #616662;background: #FCD6CB;padding: 9px 14px; border-radius: 100%; margin-top: 15px;}
ul.recent-posts-container li {padding:5px 0px;min-height:50px; list-style-type: none; margin: -2px 5px 5px 5px; border-top: 2px solid #FCD6CB;}
ul.recent-posts-container {border: 2px solid #FCD6CB; }
.recent-posts-container a { text-decoration:none; }
.recent-posts-container a:hover { color: #222;}
.post-date {color:#e0c0c6; font-size: 11px; }
.recent-post-title a {font-size: 14px;color: #616662;}
.recent-post-title {padding: 6px 0px;}
.recent-posts-details a{ color: #888;}
.recent-posts-details {padding-bottom: 5px;}
a.readmorelink {color: #4DACE3;}
</style>
How to Add Recent Posts Widget on Blogger
Want to add one of the styles above? Just follow the following steps below:Step 1. Log in to your Blogger dashboard and click on your blog
Step 2. Go to "Layout" and click the "Add a gadget" link on the right side
Step 3. From the pop-up window, scroll down and select the "HTML/JavaScript" gadget:
Step 4. Paste the code of the chosen widget found below it.
Step 5. Hit the "Save" button... and that's it!
Keep Your Blog Updated
Using a recent post widget for Blogger can truly benefit you and improve your skill as a blogger. As you can see, these designs can look great on Blogger sites, but they do act a little bit like a progress report for the author. If you start to fall behind, the dates on your recent post widget will definitely give you away.Set a schedule and make sure that you are making regular posts on the blog. These posts will be automatically updated on your widget and readers can view this information whenever they want. Add your recent post widget for Blogger on the every page of the blog or in your template so that these posts can encourage others to continue reading, thus increasing the total time spent on your site.
Đăng ký:
Bài đăng
(
Atom
)